Setting up the Lab's environment
Web-based application for coding
The labs proposed in the different modules are based on Jupyter Notebook App. This server-client application allows editing and running notebook documents via a web browser. It can be executed on a local desktop requiring no internet access or installed on a remote server and accessed through the internet.
Live demo hosted by Rackspace on how to use Jupyter App with different programming languages can be found here.
Local installation of Docker
To create the labs the following applications were used:
- IPython Notebooks
- Github: a hosting and versioning repository system
- Docker: platform to build, ship, and run applications
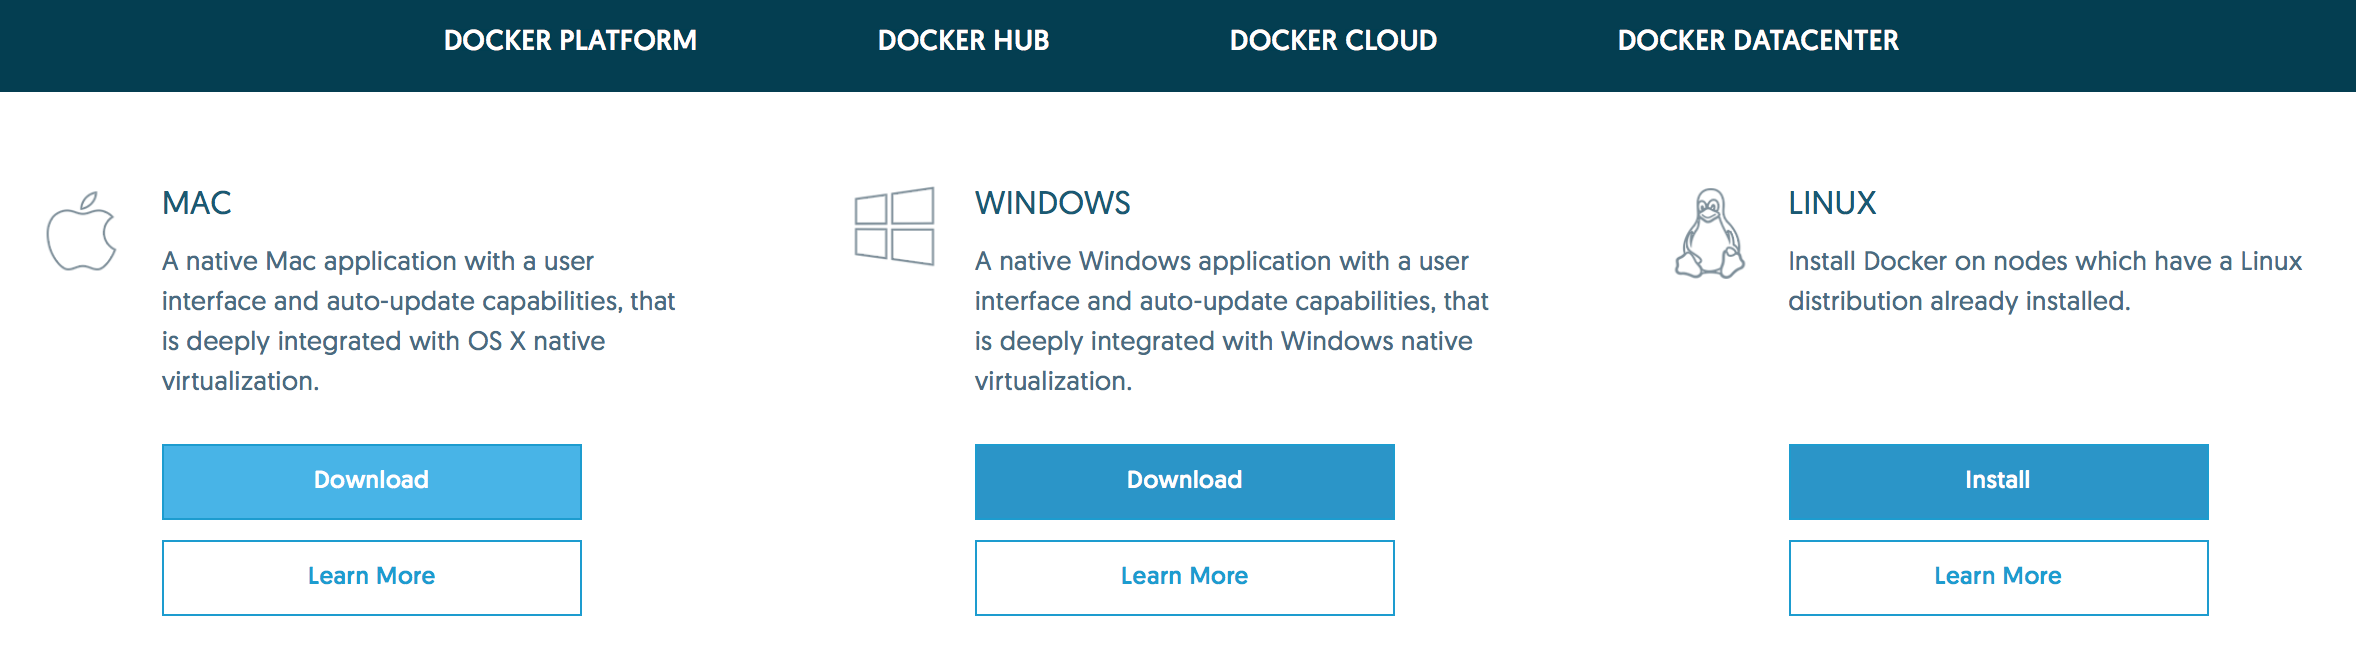
If you want to build the environment and work on the labs on your own computer you will only need to download the free Docker application by clicking on the link and choosing the right one for your operating system.
Starting and setting up Docker
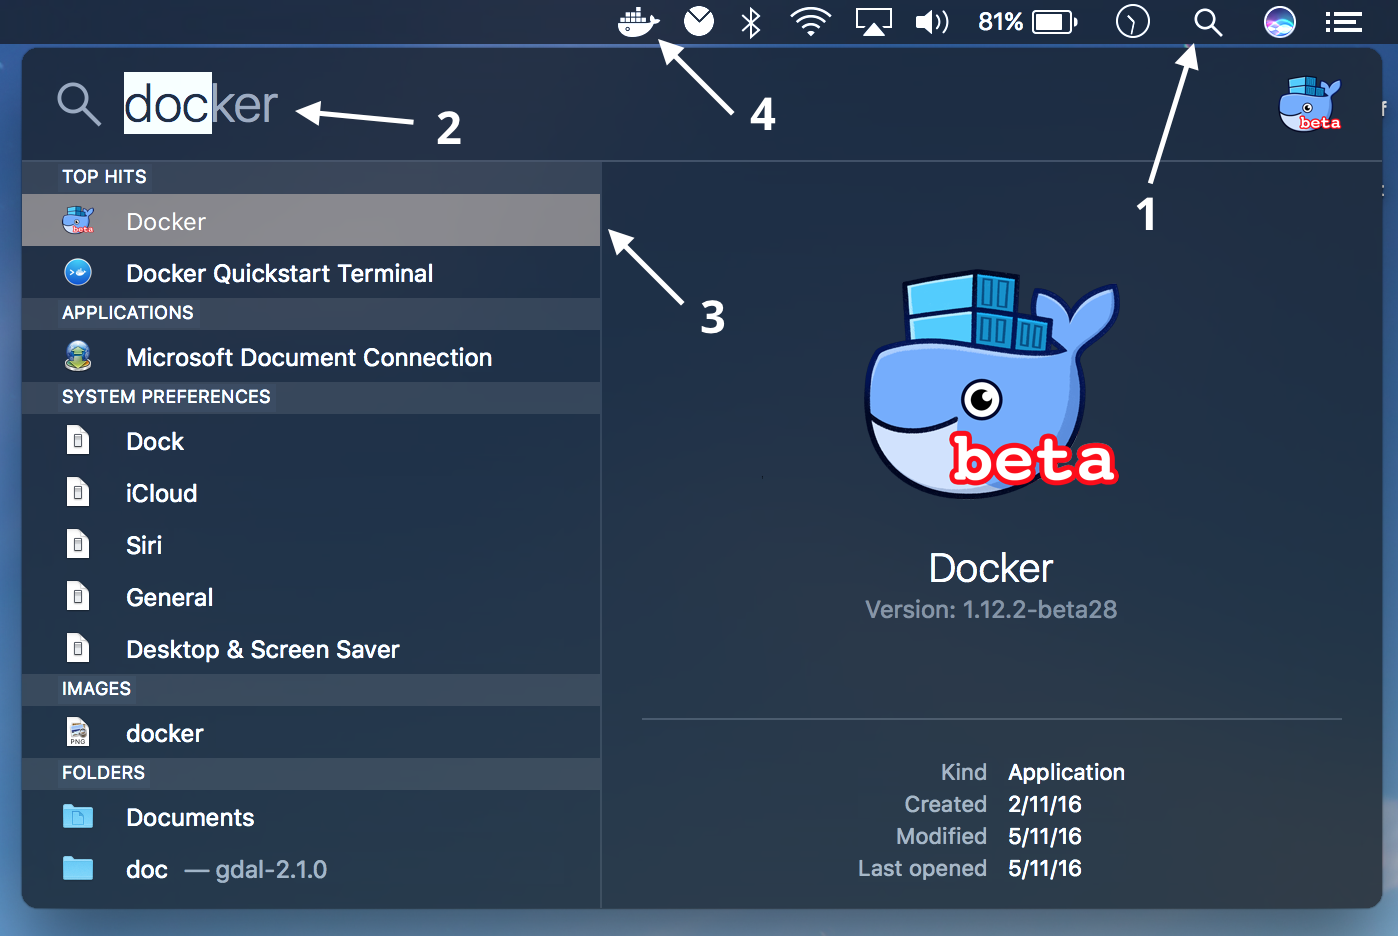
Either you have just made a local installation of Docker or you are using the computers from the labs room, you will now need to open Docker. On Windows go to "All programs" and search for Docker in the list. If you are using a Mac open the "Spotlight Search" (arrow #1 in the figure below) and look for Docker (#2), open it (#3). Once Docker is open you will get the Docker App icon on the right hand side of the top bar (#4). On Windows it will appear as other Programs and a list of onglets will be visible from the main menu directly.
It is possible to adjust the settings/preferences of Docker application by going in the "Preferences" menu (arrow #1 in the top figure). On Mac, a window will pop-up and you can allocate the number of processors (arrow #2) and memory (#3) that will be use by the software. This step is similar for Windows operating system.
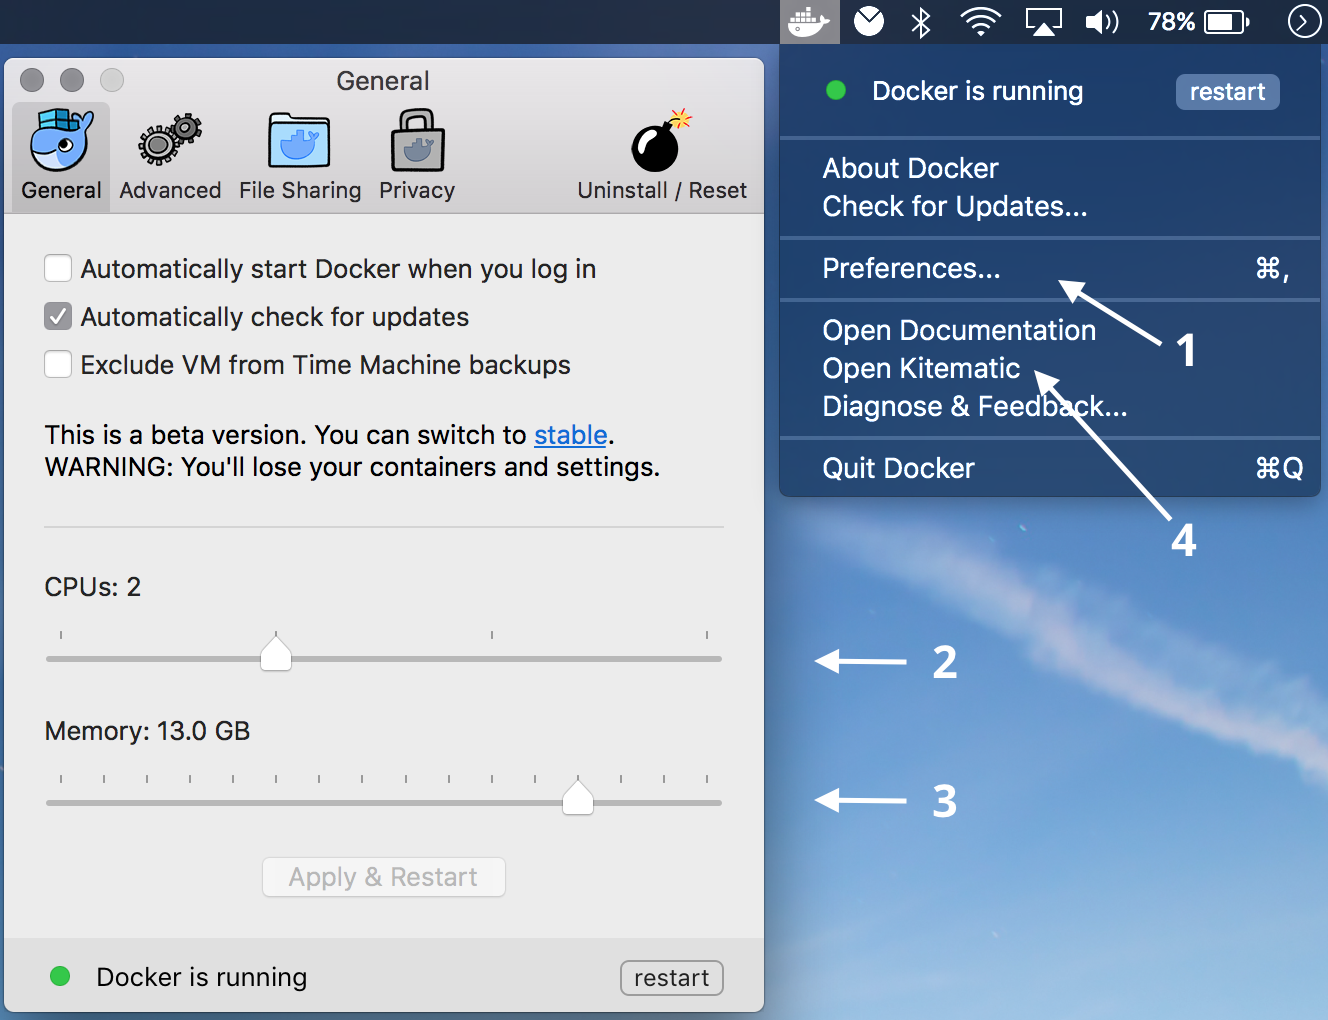
You are now ready to fire-up Kitematic (arrow #4 in the top figure).
Kitematic
Using Docker App as shown above or by looking for it directly in "All Programs" on Windows machine, open Kitematic.
Kitematic is an open source project built to simplify and streamline using Docker on a Mac or Windows PC. Kitematic automates the Docker installation and setup process and provides an intuitive graphical user interface (GUI) for running Docker containers.
During the opening process the application might ask for a Docker Hub account and you will skip this step as it is not required for our labs.
Once the initialisation process finishes (it could take several minutes the first time), a window will pop-up similar to the one below:
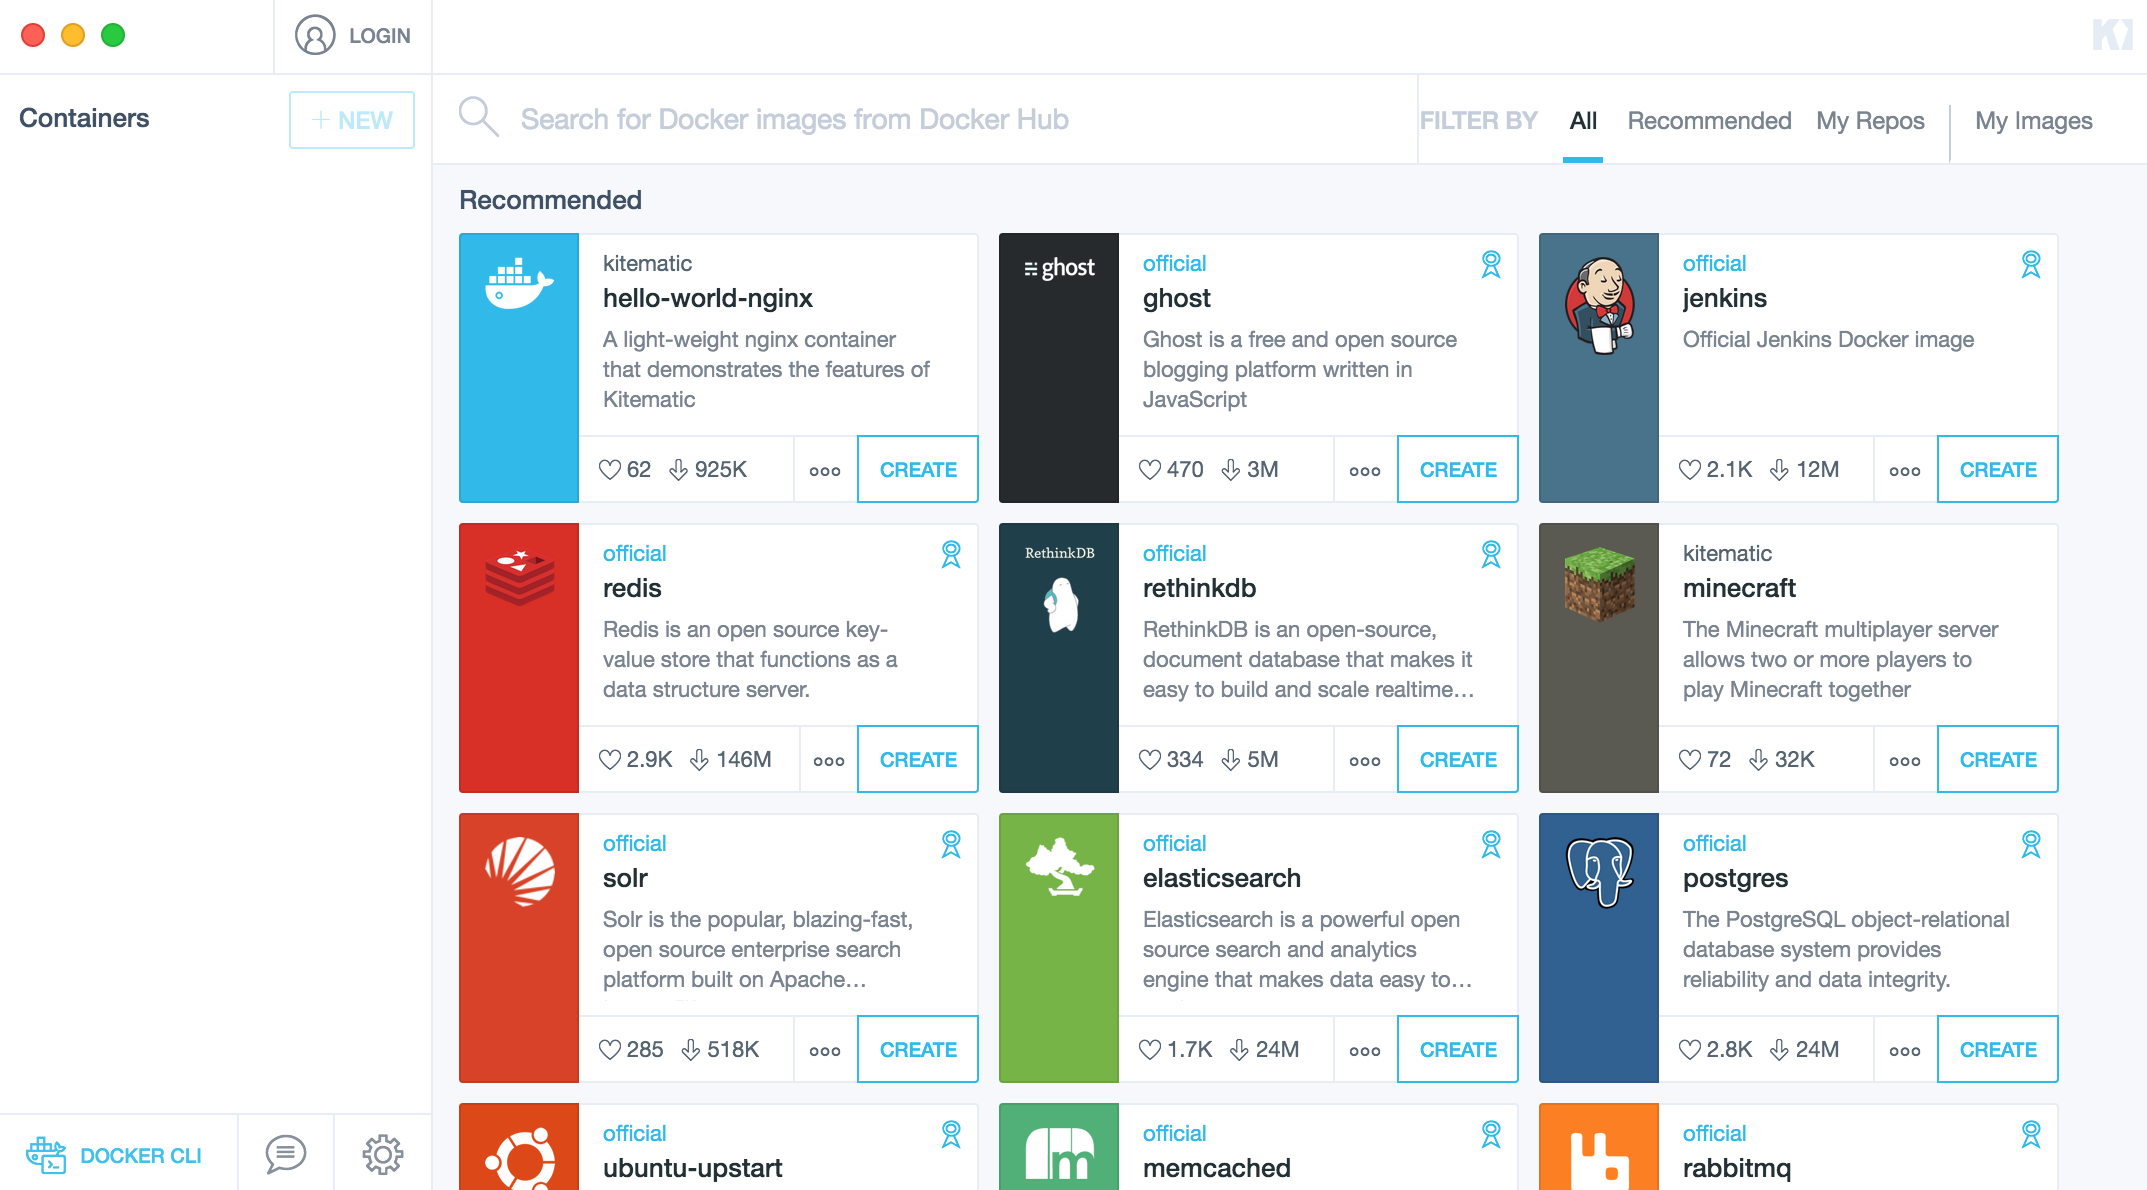
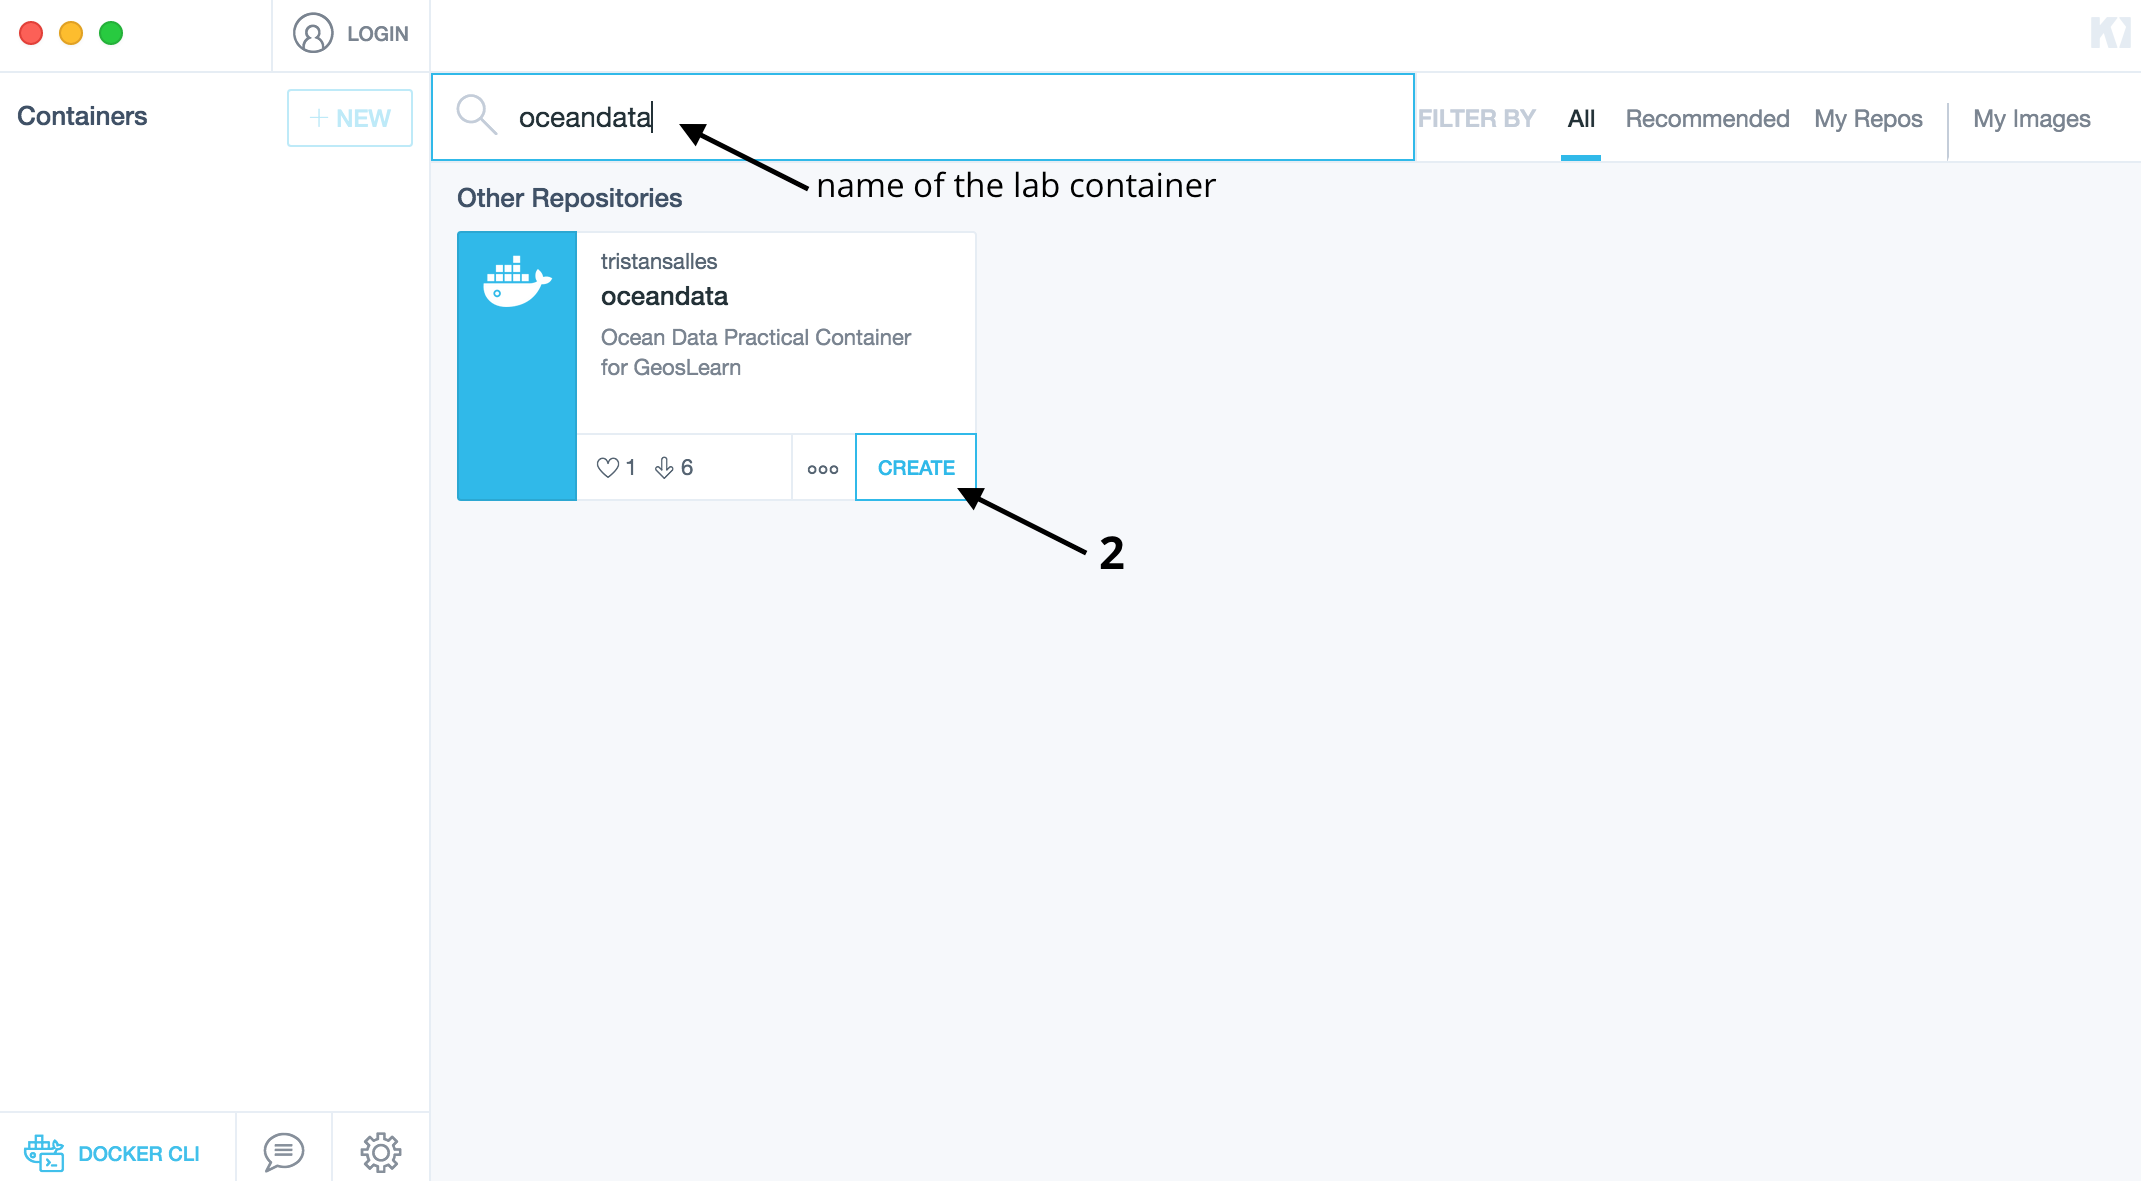
We will now start the Jupyter container containing the labs exercise by searching for the module name provided in the labs materials. To do so search of this container as shown in the figure below and click on the create button (arrow #2). When you will create the container for the first time, this operation will take several minutes.
Setting up the lab container
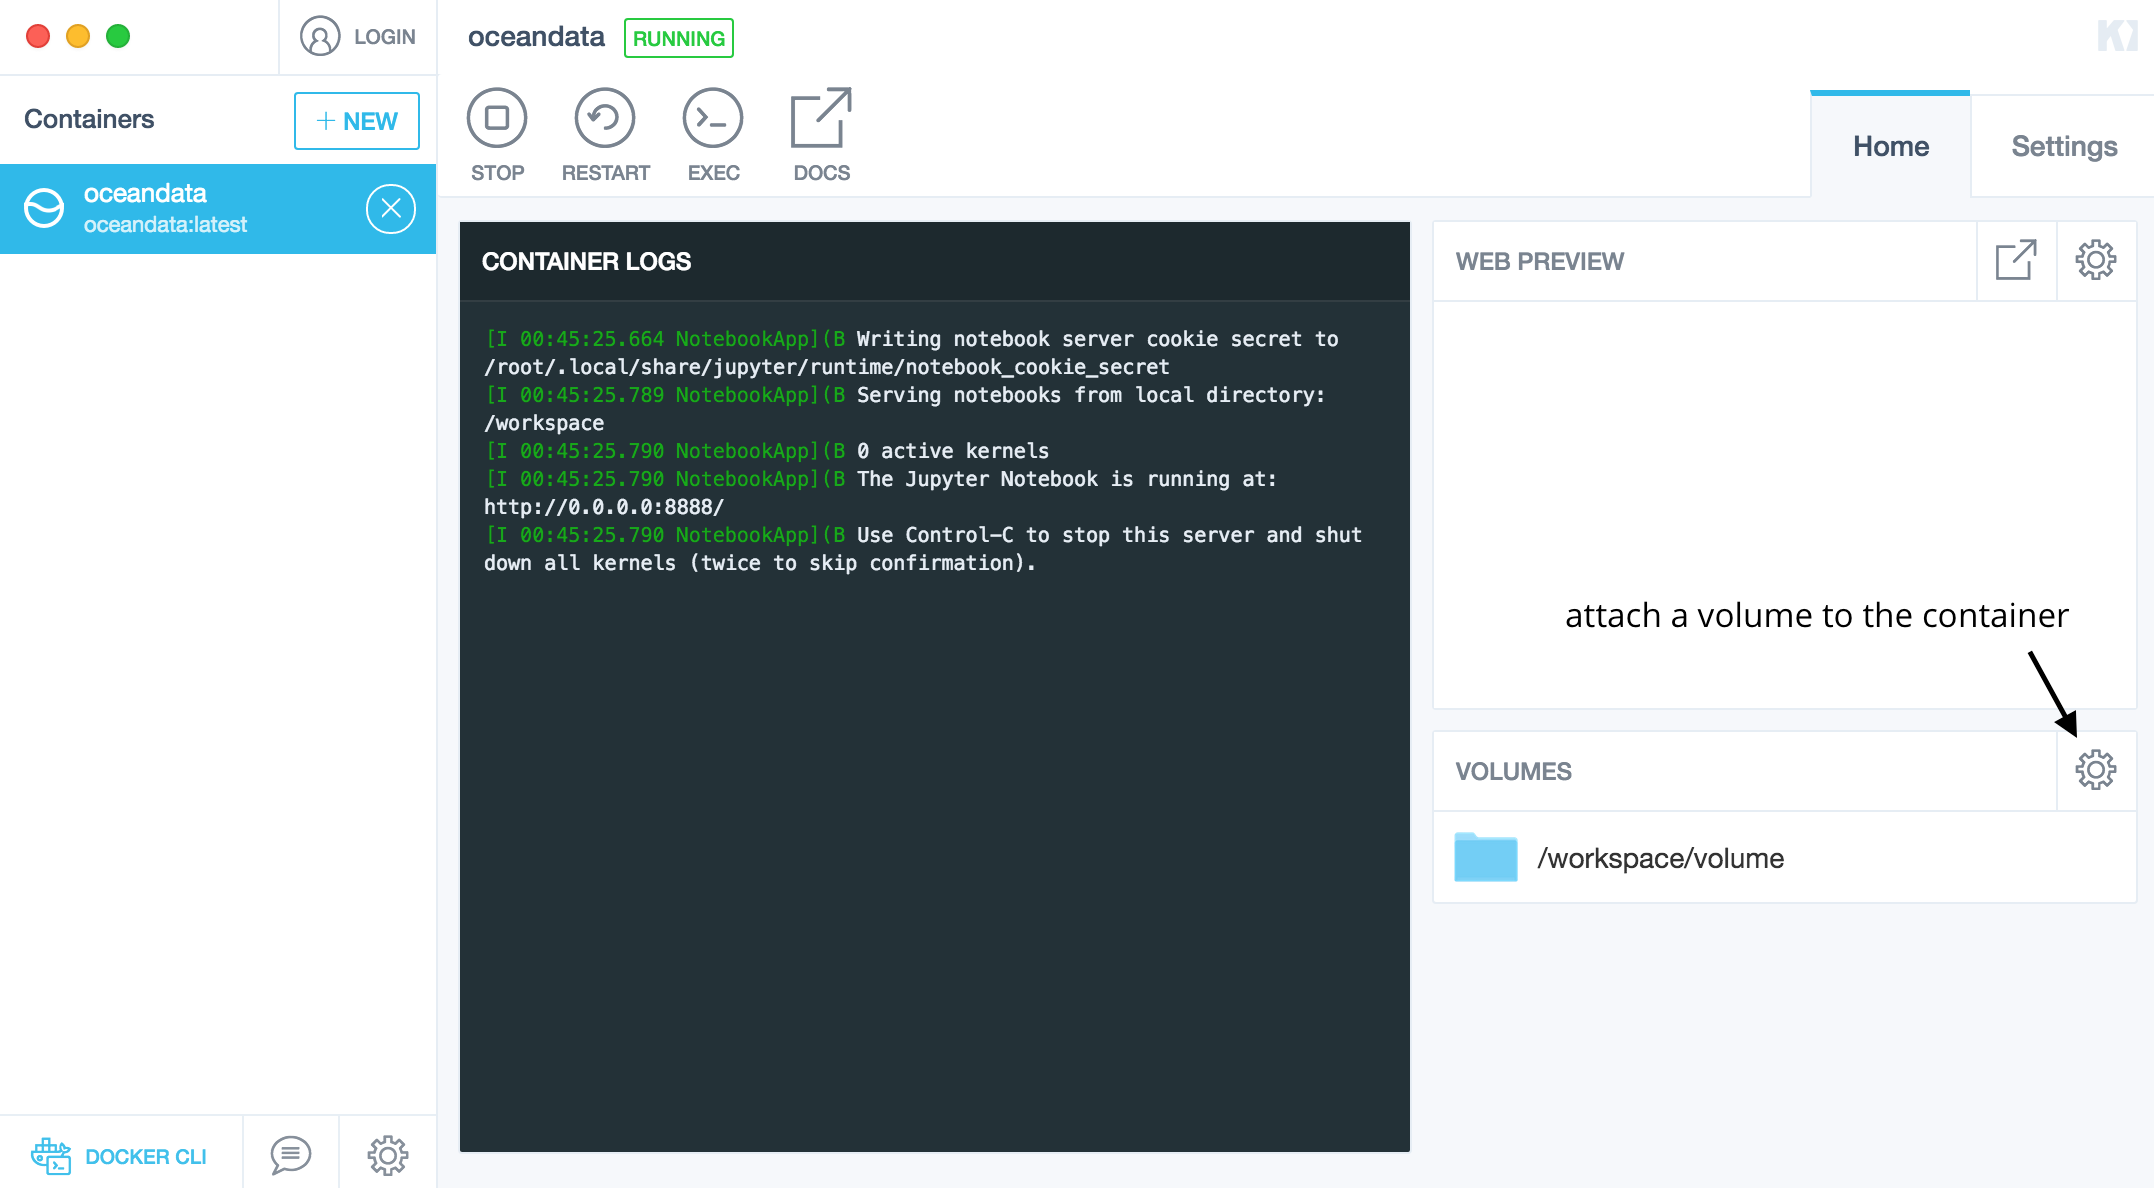
Now that the container has been installed on the computer, we will link the container to a specific folder also called a volume on the machine.
This operation allows you to use native text editors on your local environment and protects any work you do from loss
- deleting a Docker container will not delete the files in mounted volumes (unlike files hosted locally by the container itself).
To set up the volume, click on each of the "wheel" icon as shown in the figure below.
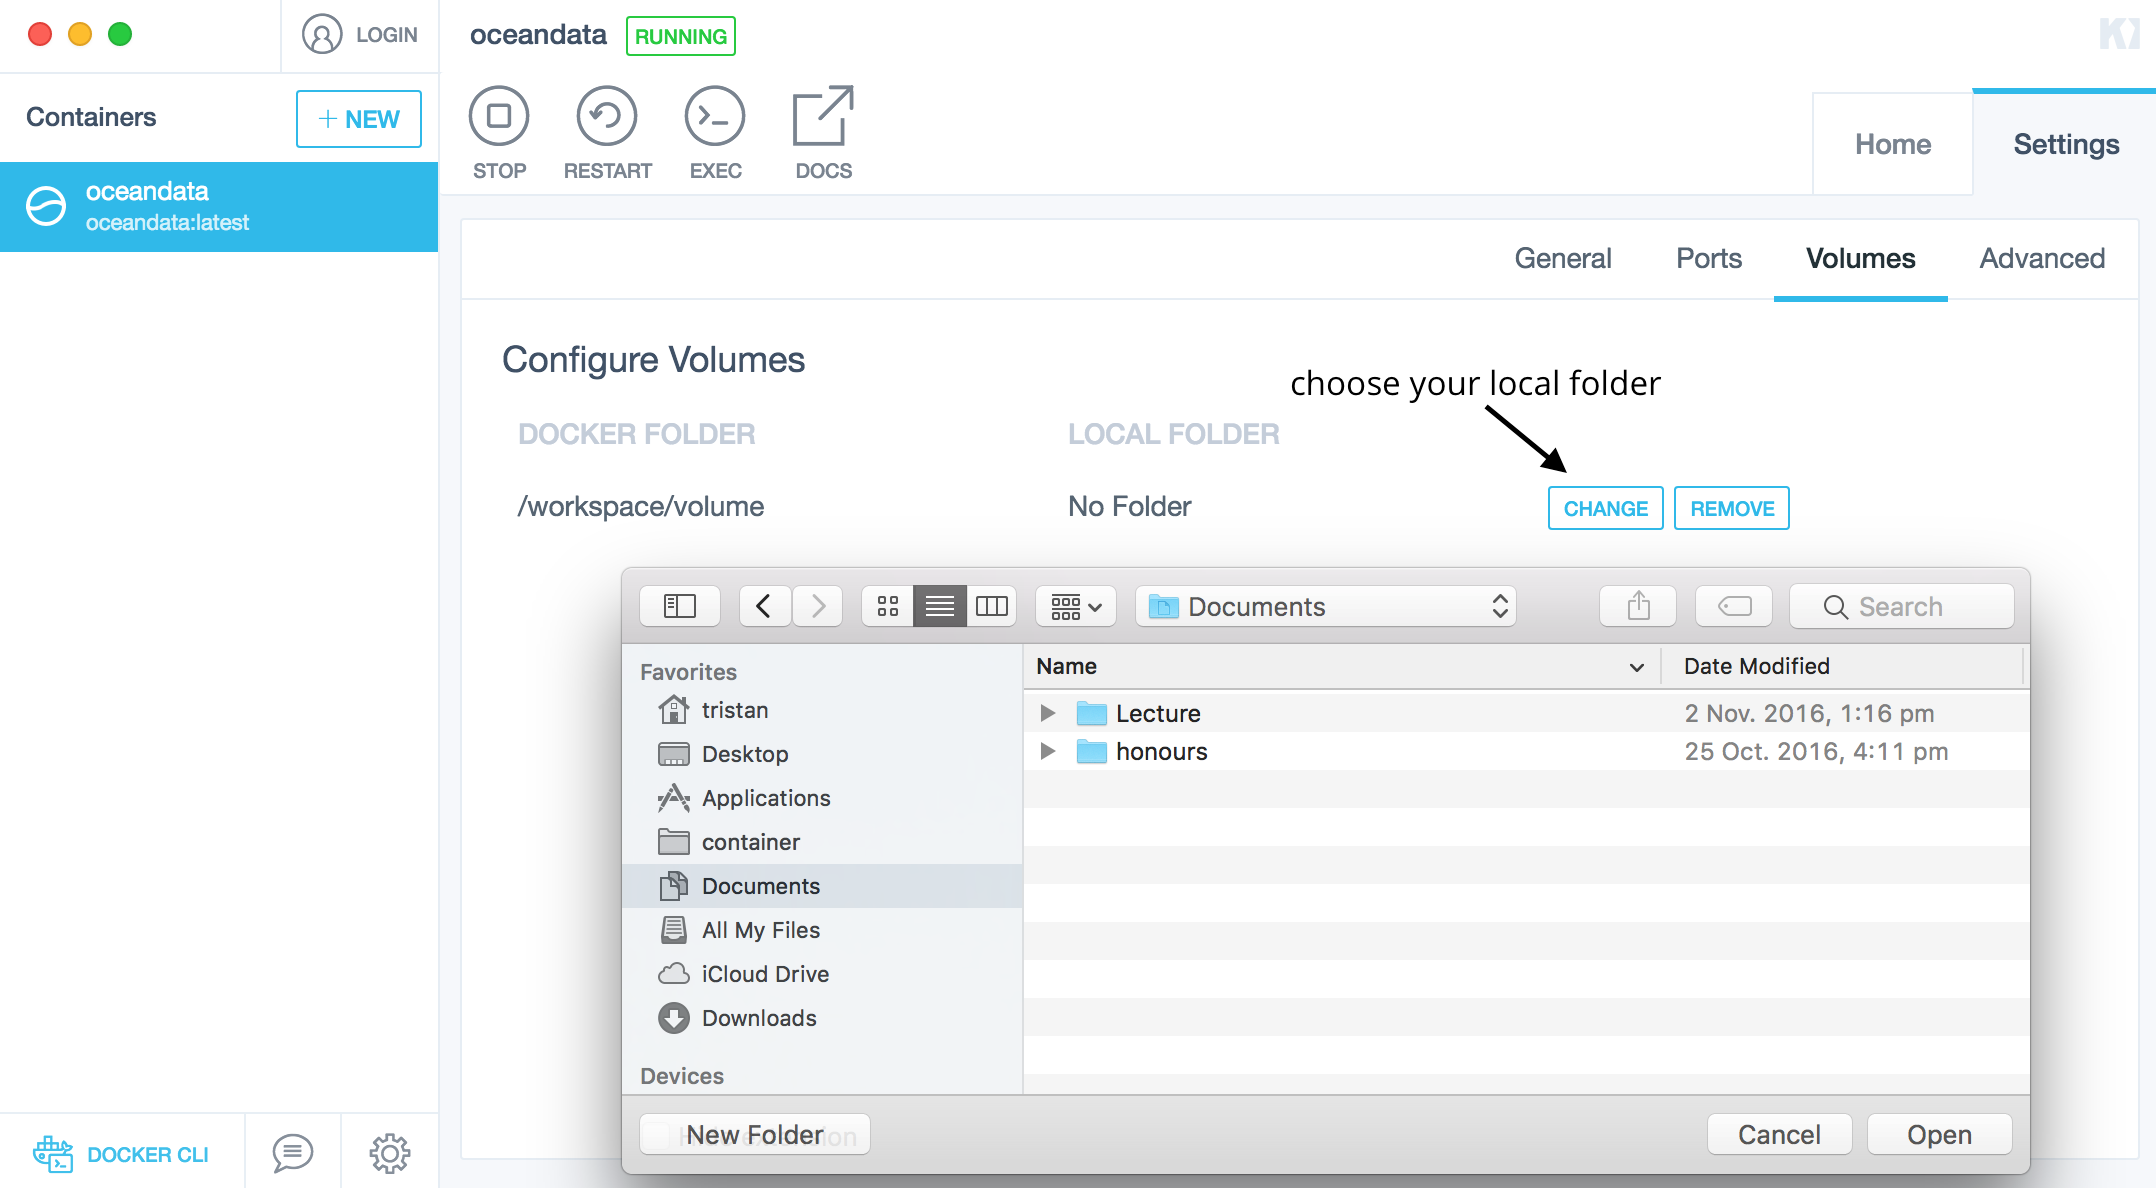
From the pop-up window (see figure below) look for the directory where you want the local data to be store on your local development machine. It will also allow you to easely create, modify or delete files/directory directly from your machine.
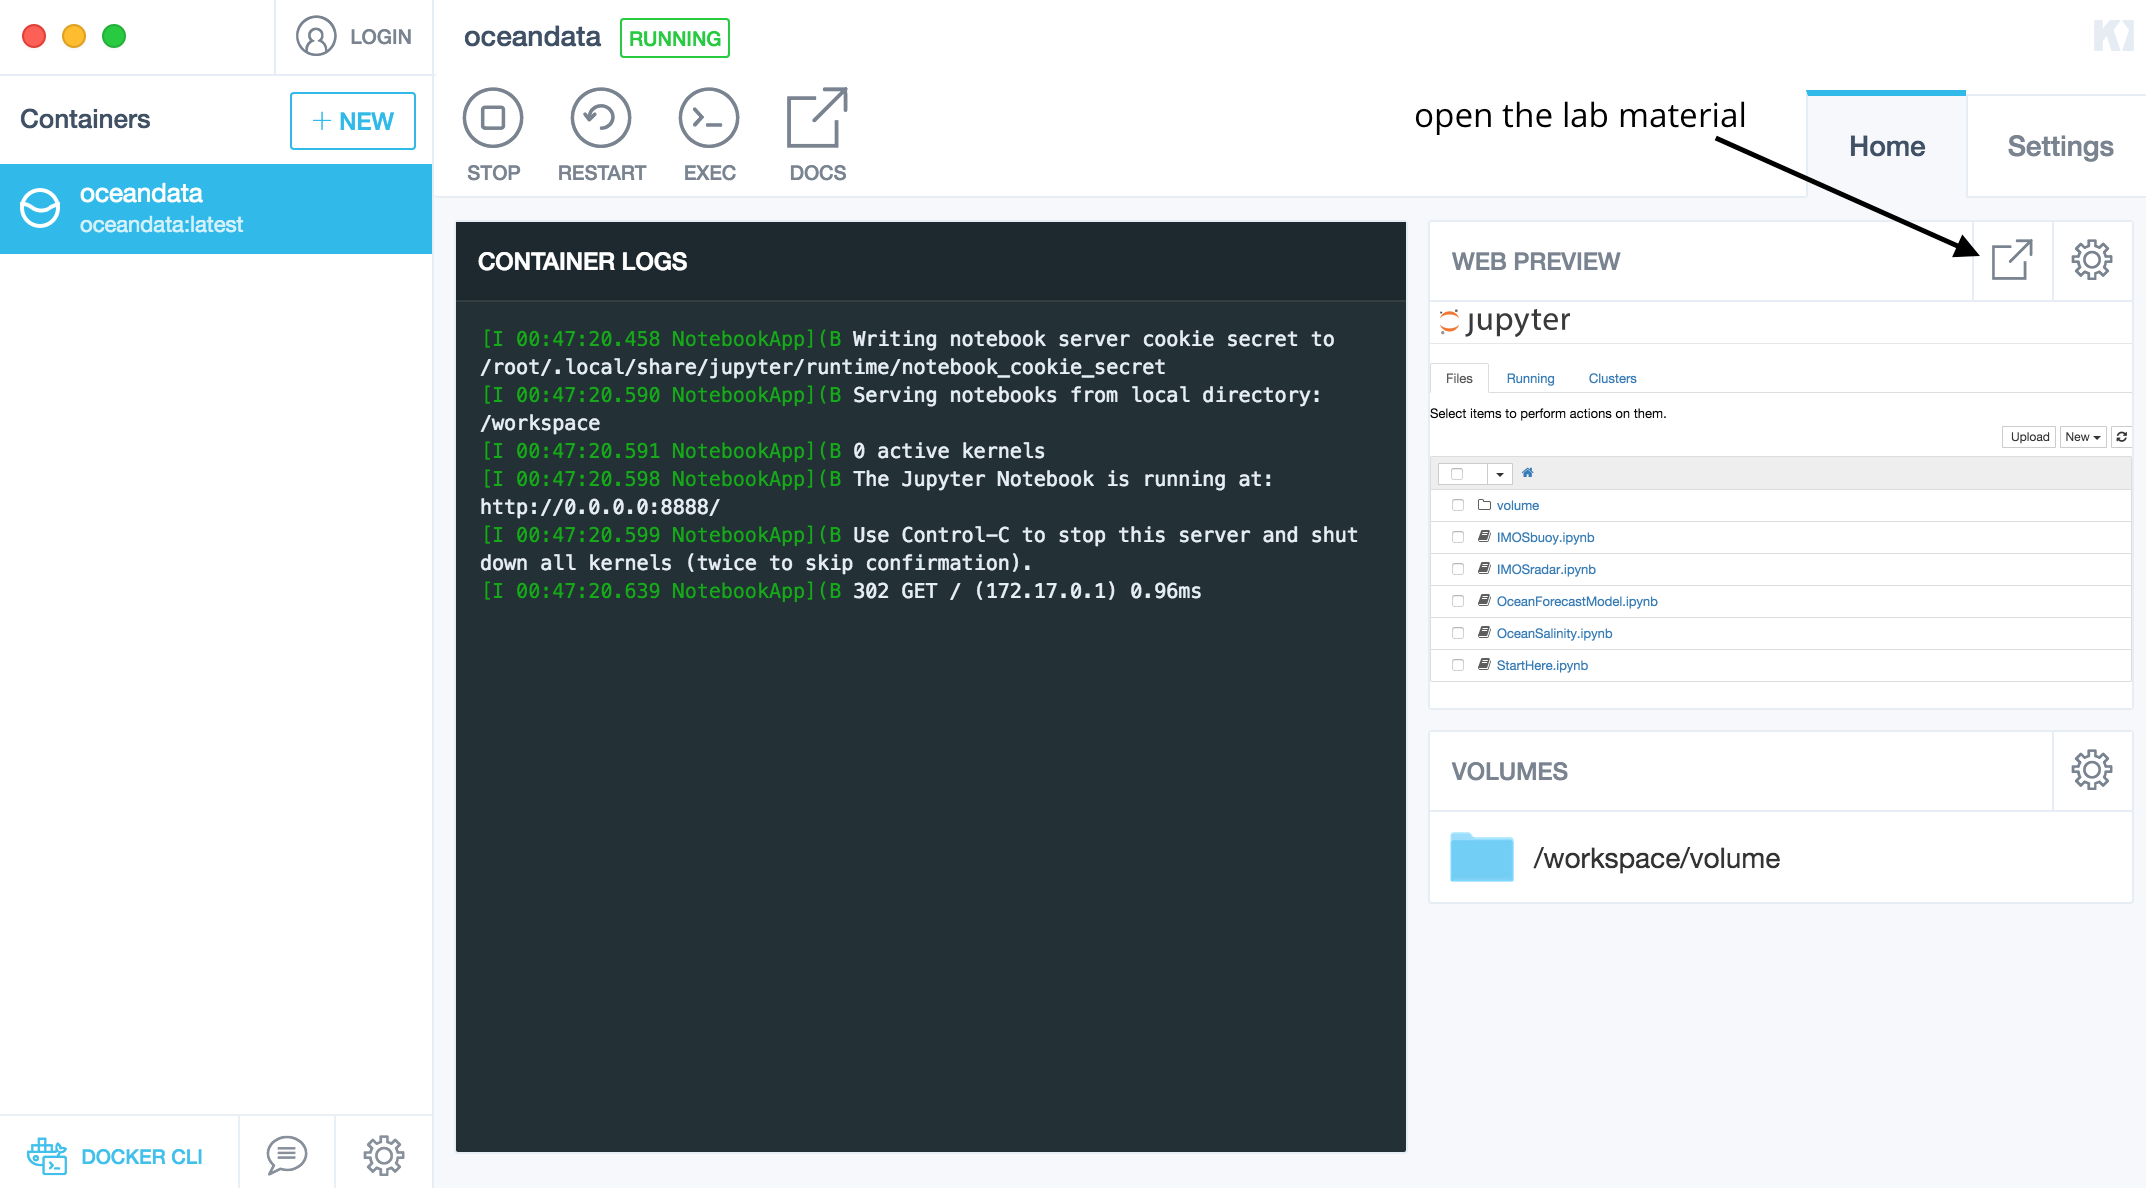
You are now ready to open the Jupyter environment using the icon shown below. It will open the lab notebooks in a web browser.
Running lab's notebooks
The Jupyter Notebook is officially supported for the following browsers:
- Chrome
- Safari
- Firefox
The is mainly due to the notebook’s usage of WebSockets and the flexible box model. From experience, Firefox seems to give better
integration that Safari.
When you launch Jupyter notebook the first page that you encounter is the Notebook Dashboard. This page is your
"home" directory and shows a file tree view of the folders and files installed on the container (as shown in figure below). The volume is the folder
connected to your local architecture and the place where you will store your lab outputs to prevent any lost.
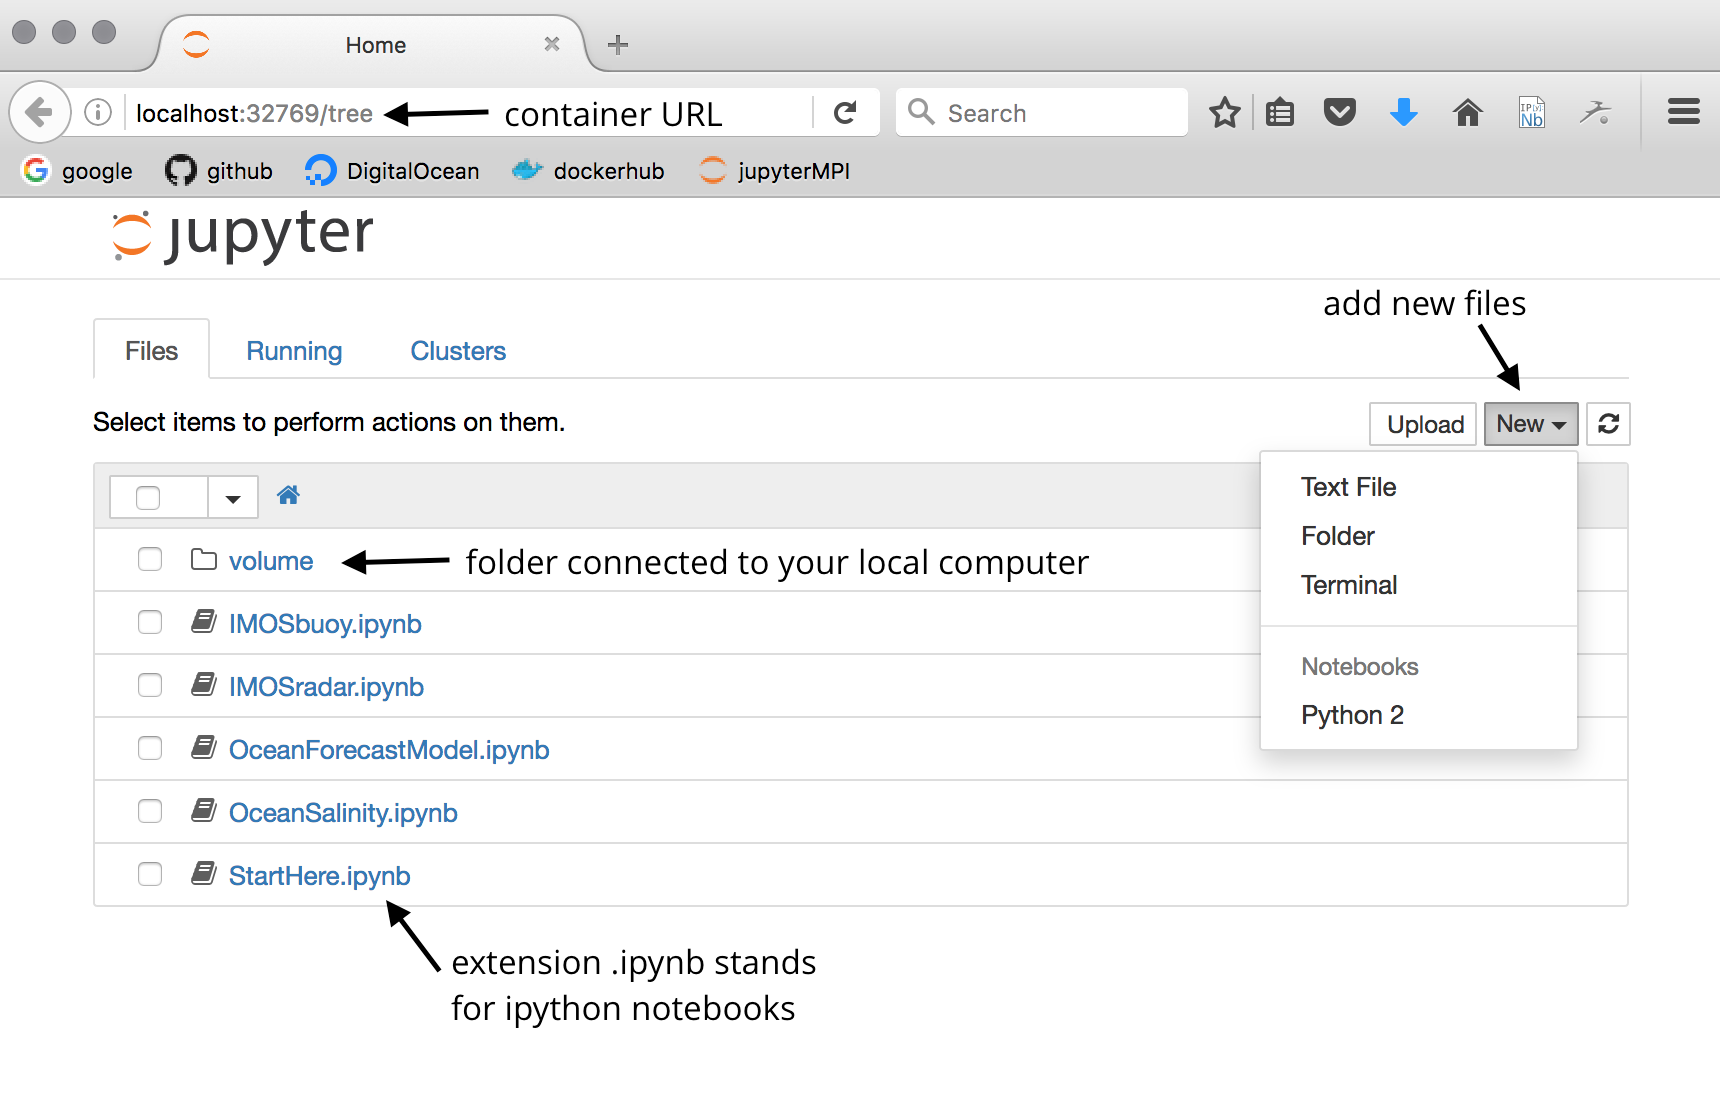
Once you’ve selected a Notebook file (.ipynb extension), the Notebook will open in the Notebook Editor.
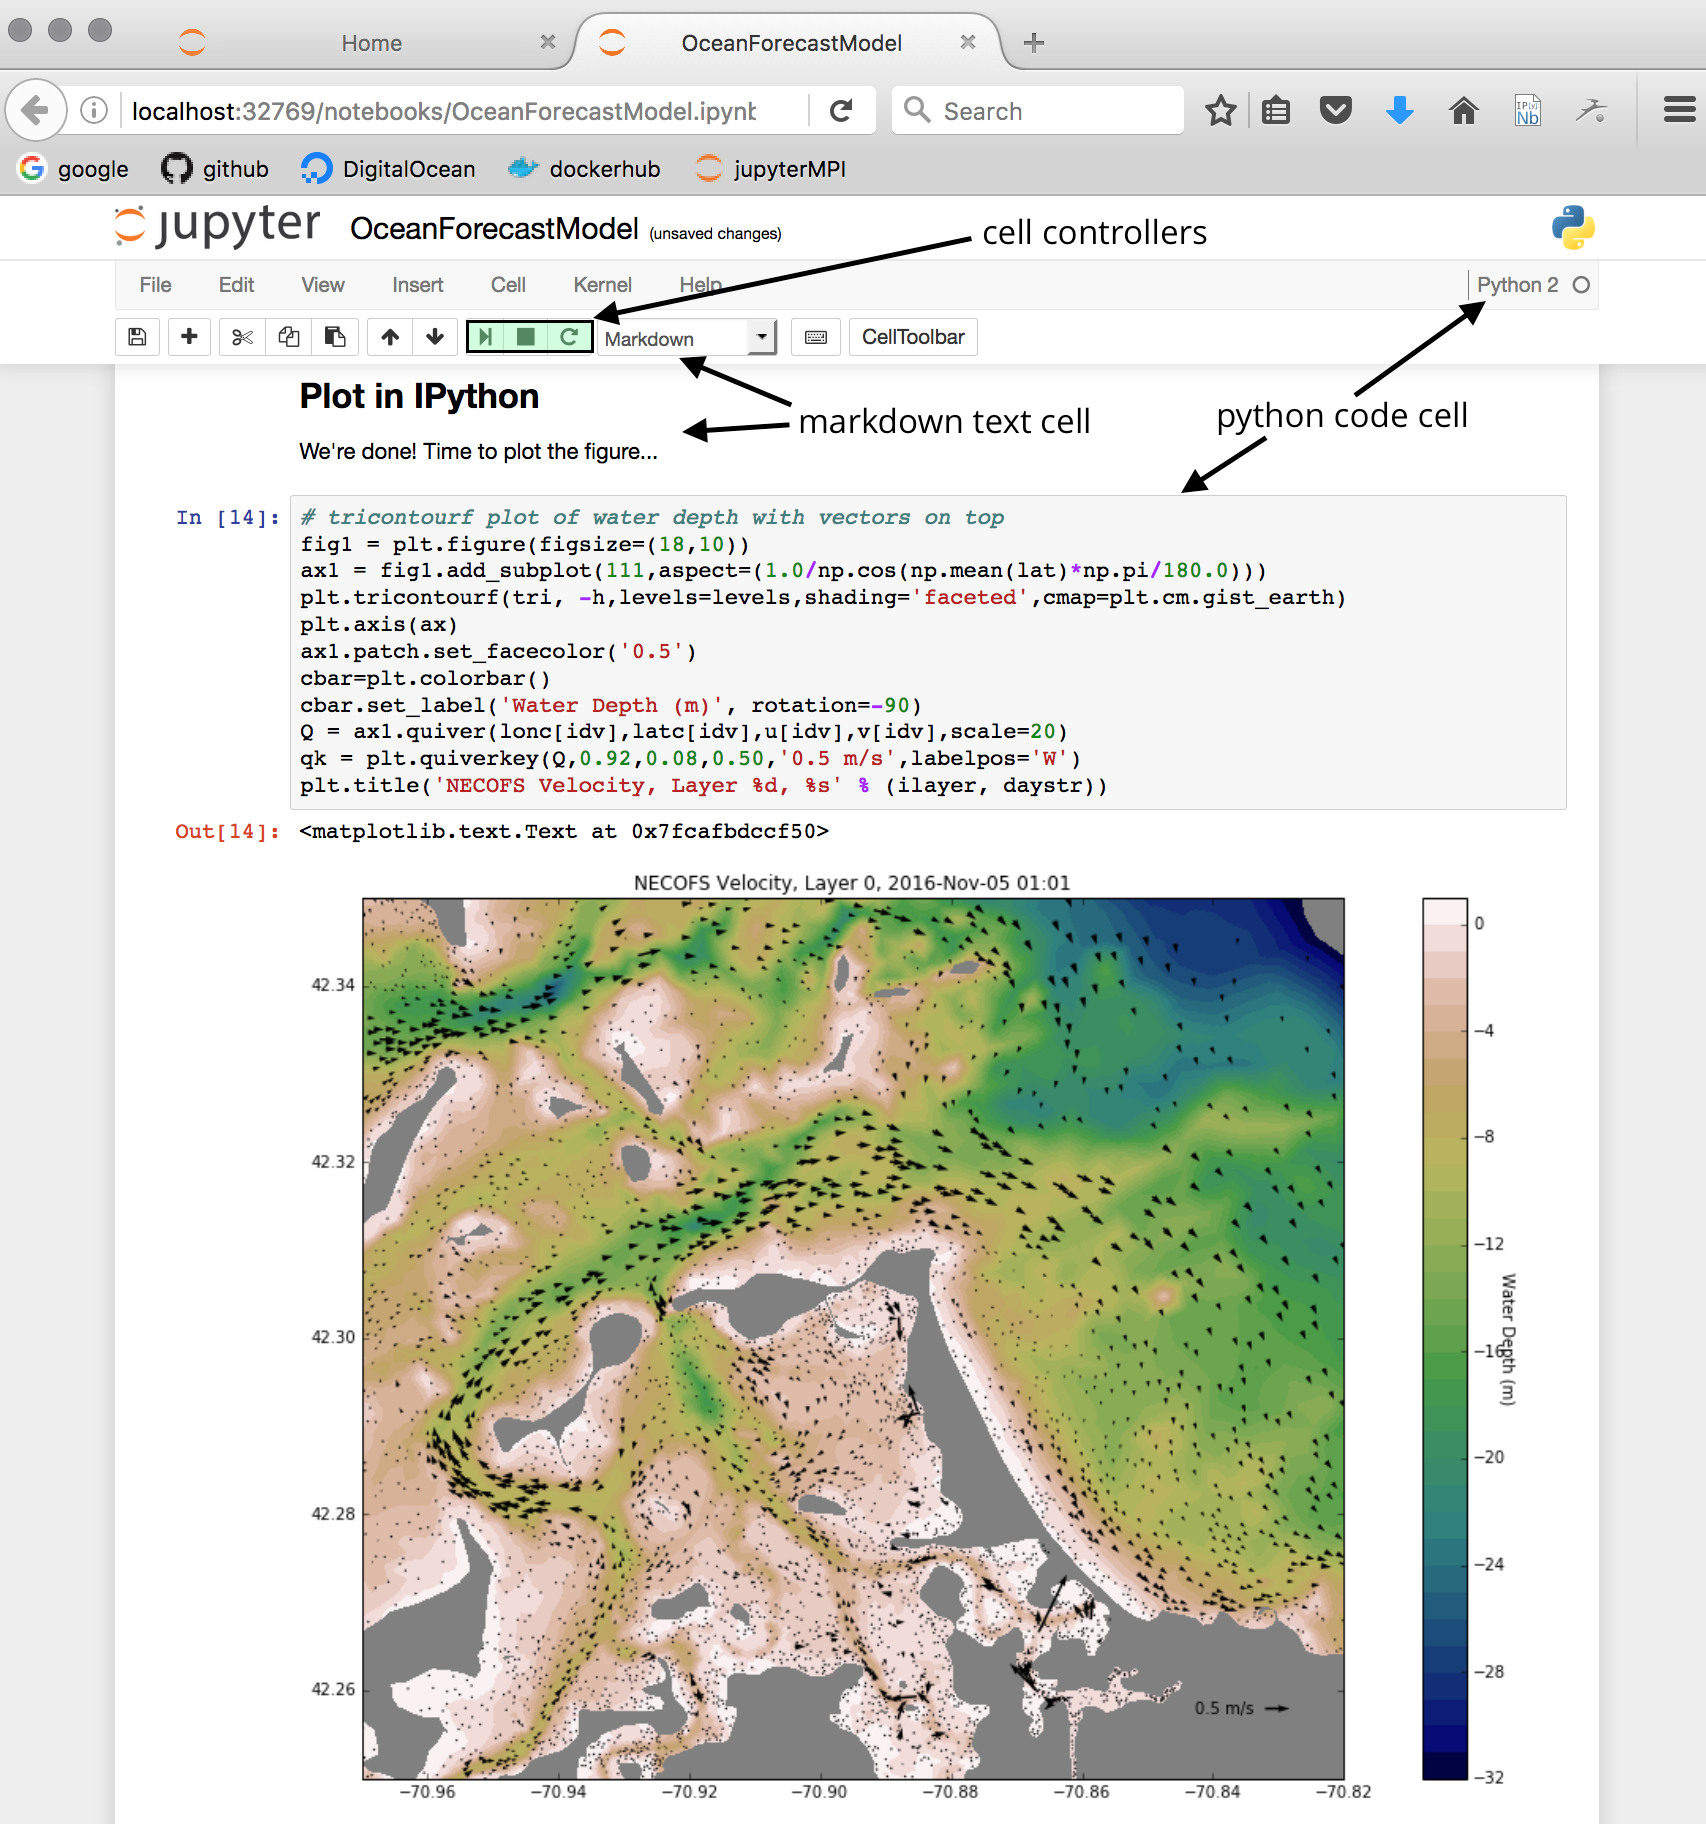
The notebook consists of a sequence of cells (see above figure). A cell is a multiline text input field, and its contents can be executed by using Shift-Enter, or by clicking either the "Play" button the toolbar, or Cell | Run in the menu bar.
The execution behavior of a cell is determined the cell's type. There are four types of cells: code cells, markdown cells, raw cells and heading cells. Every cell starts off being a code cell, but its type can be changed by using a drop-down on the toolbar (which will be "Code", initially).
For more information on the different things you can do in a notebook, see the collection of examples.
Examples of IPython interactive demo from Nature Journal